Hello everyone. This week highlights the Ultimate Package with this Japandi Studio design project. The package offers clients everything needed to create a an interior design transformation. Included in one price is a consultation, colour palette, moodboard with 20 linked products and a 2D and 3D colour rendered design. You also get 3 revisions to design and a month post design support!
It is everything you need to transform a room that’s an interior design colour headache right now!
Let me help you choose the perfect colour palette, suggest paints and furniture to suit the design style and support you as you transform your room. Check out packages here or you can get in touch by dropping me a message via instagram if that’s easier.
Now, let’s dive into this studio in Brentwood, Essex to see how I brought Japan and Scandi to Essex!
Studio design: Where to start?
First, Studios are always a challenge, however I love them because I specialise in creating rooms that are multi-functional for homeowners. You need to know the intention for the space and vibe you want to create. This client wanted to have their bedroom, lounge, dining room and work from home space all in one room – because studios are typically one room! I knew what they needed in terms of function but I wanted to find a colour starting point and the client had no idea but was happy for pops of colour.
I love that inspiration can strike from the most unexpected places and it started here from a single source; the client’s vibrant yellow and orange throw blanket. It was the one thing they had purchased for the new property and it led the colour palette choice.
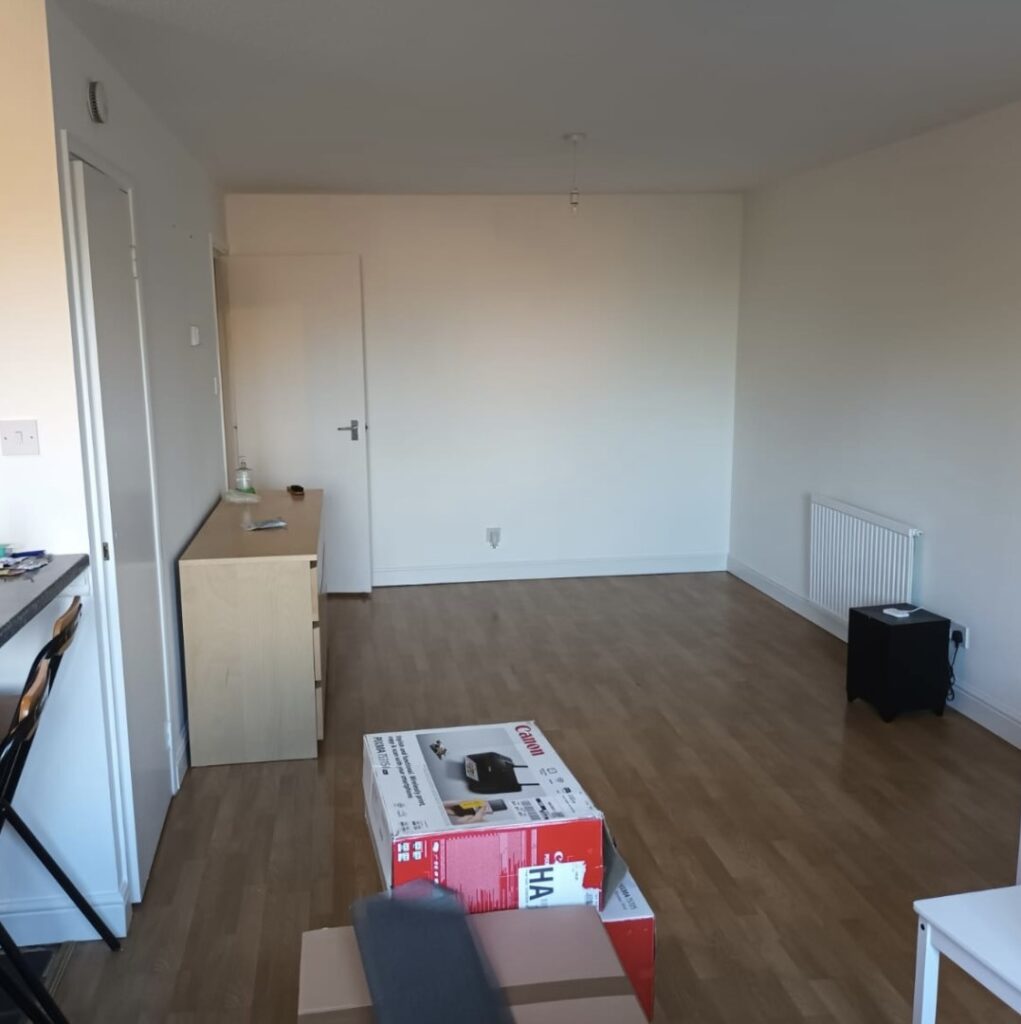
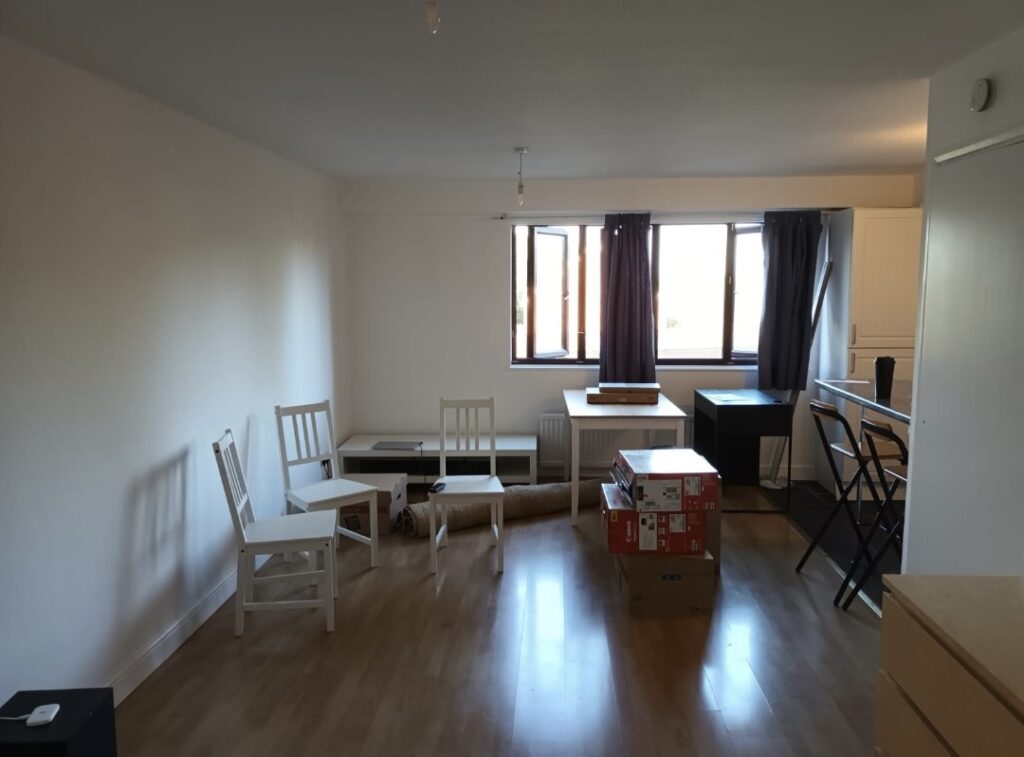
So, you must be wondering, what did the space look like to begin with? I am glad you asked! Here are some before photos the client sent with the measurements and a plea for help on layout of furniture.
Designing the Colour Palette
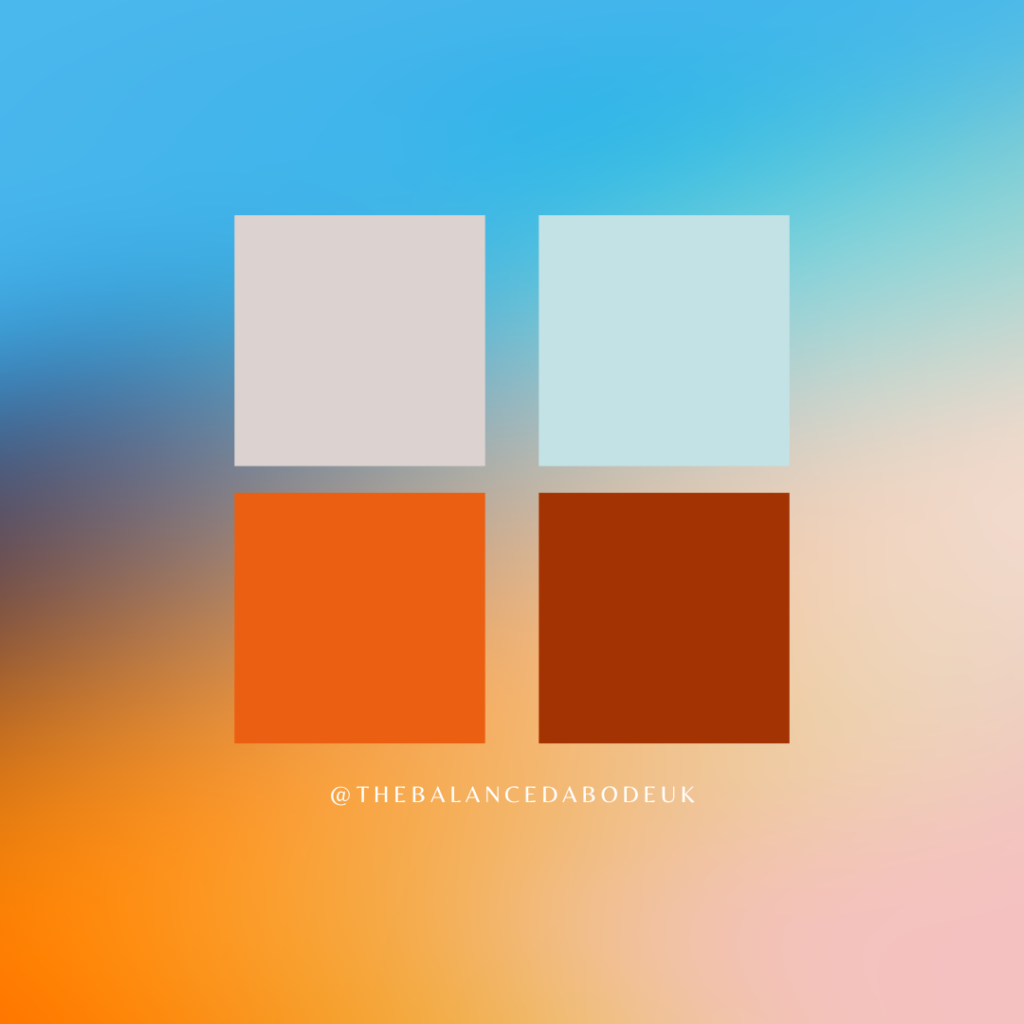
Second, before creating layout designs, colour is key and this should evoke a feeling for you! The design process kicked off with a captivating colour palette inspired by the throw blanket and the client did suggest designer’s choice was fine. I wanted to infuse the space with the warmth of burnt orange and the soothing coolness of light blue. This choice was not just about aesthetics; it adheres principles of Feng Shui harnessing the energies of Fire and Wood. With cool greys for Metal energy, earthenware accessories and abstract black and white art for Water, I soon created a balanced and harmonious atmosphere.
Crafting the Moodboard
Next, I crafted a moodboard that would serve as a visual guide throughout the project to bring ideas together. I carefully selected furniture and accessories that resonated with the colour palette and met the client’s lifestyle needs. Organic shapes, natural materials, and items that promoted overall well-being took centre stage to create the Japandi style.
Not forgetting that throw which was the starting inspiration! Can you see it in the moodboard below the sofa?
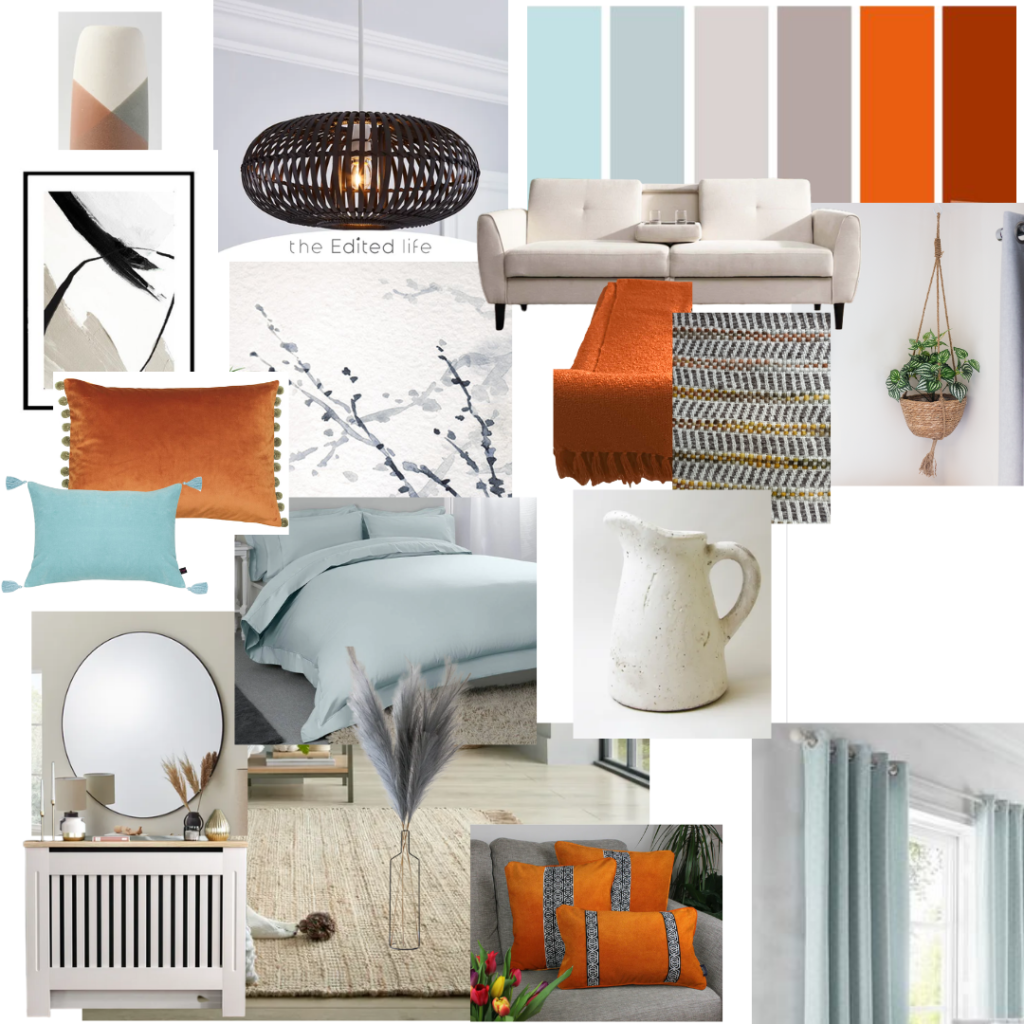
Moodboard: linked with places to purchase the items for the client
Bringing the Vision to Life
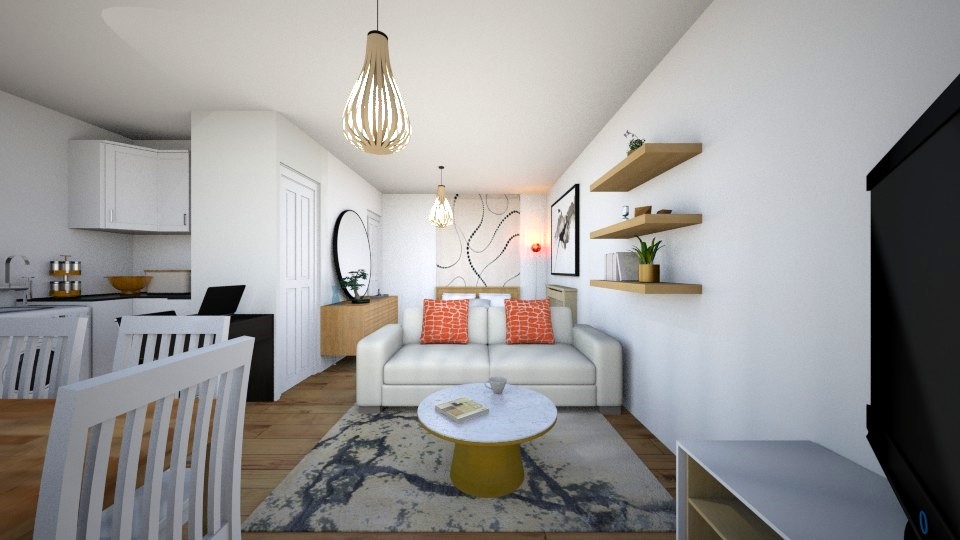
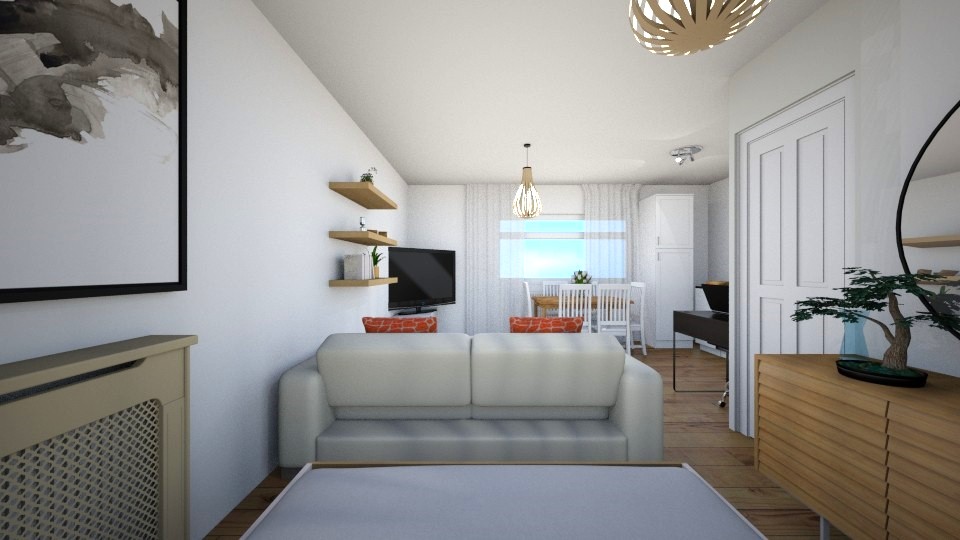
Finally, with the colour palette and Japandi theme agreed with the client, I wanted to bring the vision of the Studio design into a 3D render. My clients always love the tangible glimpse of the interior design project. It is also a crucial step as an interior designer to demonstrate how the colours, shapes, and materials would interact in the final design.
This is where we answer ‘How do I arrange furniture in a studio’ and the 3D render below is a perfect example.
Finally, the result of this Studio 3D render was a layout that seamlessly blended function and aesthetics. The design enabled the client to sleep, work, entertain dinner guests, and relax in their cozy Brentwood studio.
Materials and Accessories
In addition to the above 3D layout instruction, the client can see why I opted for natural tones that created a sense of grounding. I love how renders help the home owner connect with their new surrounding environment. Organic shapes were incorporated to infuse the space with a touch of nature, promoting a sense of tranquility and balance.
This small studio apartment was enhanced by not only how the furniture was laid out, but with with natural textures and materials. By adhering to Feng Shui principles, I transformed the space into a haven that not only looks beautiful but also feels serene and invigorating.
Lastly, it’s proof that even the smallest of spaces can be re-imagined to accommodate various facets of life, all while promoting well-being and balance!
In the end, this studio apartment is now more than just a living space; it’s a testament to the transformative power of design. The ability to draw inspiration from the world around us, even from something as simple as a throw blanket. Get in touch to talk about your next interior design project!